Mastering the Prairie King arcade game is a challenging feat. The difficulty lies in stringing together multiple levels without dying, making saving progress after each successful run crucial.
Keeping progress ensures that players can resume their quest to conquer and overcome the game’s challenges. This article will explore strategies, tips, and recommended purchases to help players achieve victory in Prairie King.
Saving Progress & Restarting Fector's Challenge
To ensure that progress is preserved, saving the game after completing each level in Fector’s Challenge is crucial. It can be done by quitting the game by hitting Escape, returning to the farmhouse to sleep, triggering an autosave, and progressing to the next day.
Do this at every checkpoint to ensure you can return to your furthest stage without repeating when you die in-game.
If players fail to meet certain conditions, such as dying or not collecting enough coins, in that case, they can reload the game at the start of the day to give themselves another opportunity to succeed.

Purchases during the Run
Strategic purchases play a vital role in increasing the chances of success in Fector’s Challenge. Upgrading boots, guns, and ammunition is highly recommended to enhance survivability and firepower.
It is important to outline the purchases after each level, ensuring players have the necessary upgrades at specific stages to overcome the increasing difficulty. The following table provides an overview of the recommended purchases:
Level | Recommended Purchases |
Level 1 – Area 2 | Ammo Box (15), Gun (10) |
Level 1 – Area 4 | Ammo Box (30) |
Level 2 – Area 1 | Gun (20), Ammo Box (30) |
Level 2 – Area 3 | Ammo (45) |
Level 3 – Area 1 | Gun (20) or Boots (8) |
Level 3 – Area 3 | Boots (8) or Gun (20) |
Ideal Run Example

A breakdown of a near-perfect run serves as an excellent reference for players aiming to conquer Fector’s Challenge. Collecting enough coins is particularly important, especially to unlock Ammo2 by World 3.
This example highlights the significance of strategically acquiring enough coins at specific stages to optimize gameplay and increase the chances of success. The following table illustrates an ideal run example:
Level | Coins Collected |
Level 1 – Area 1 | 9 |
Level 1 – Area 2 | 7 |
Level 1 – Area 3 | 12 |
Level 1 – Area 4 | 12 |
Level 2 – Area 1 | 9 |
Level 2 – Area 2 | 9 |
Level 2 – Area 3 | 16 |
Level 3 – Area 1 | 3 |
Level 3 – Area 2 | 20 |
Level 3 – Area 3 | 7 |
Total Coins: 104 | |
Tips for the Level 2 - Area 3
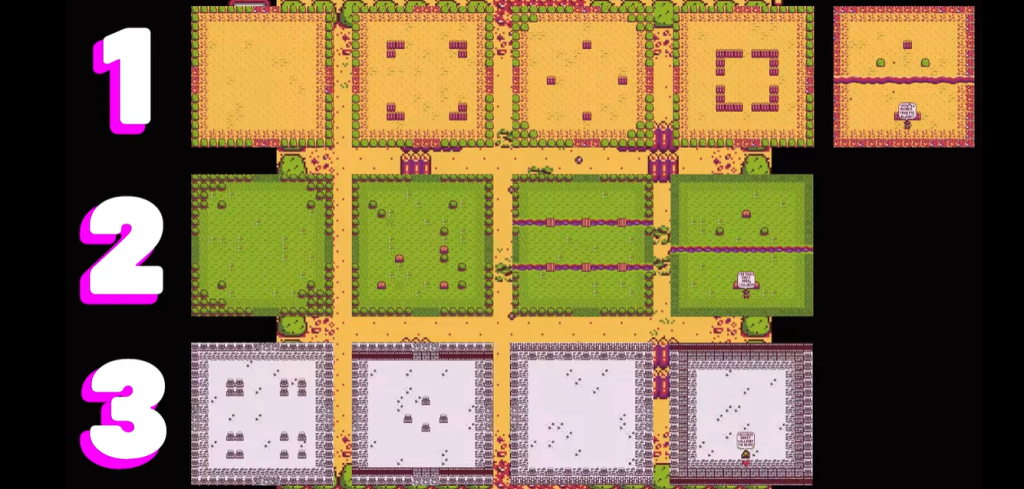
Levels 2-3 present unique challenges that require specific strategies to overcome. Players should focus on using bridges as blocks to shield themselves from enemies and clearing foes from the sides to create a safer path.
Simultaneously, collecting power-ups and coins while carefully moving between bridges maximizes the chances of success at this treacherous level.
Tips for the Level 3-3
Level 3-3 introduces many enemies, presenting a formidable challenge. To overcome this onslaught, players must use the horde of enemies as a buffer against flying adversaries.
Additionally, saving power-ups for swarms of enemies proves invaluable in dealing with the difficulties of this level.

Boss Kills
Defeating bosses in Fector’s Challenge can be made easier with specific strategies. When facing the Outlaws, players can hide behind cover and shoot diagonally to defeat them safely.
Furthermore, employing various techniques, such as moving left and right, or retreating to the far corners, can expedite the defeat of Fector.
General Tips
Several general tips can significantly enhance players’ chances of success in Fector’s Challenge of Stardew Valley. The randomness of coins and power-up drops necessitates adaptability in strategies.
Holding the center and utilizing bridges as blocks help maintain control over the battlefield. Conserving power-ups and collecting flashing power-ups when it is safe are crucial elements of successful gameplay.
Additionally, avoiding spawn [1] zones is essential to prevent unnecessary deaths and maintain progress.

Time Estimate & Difficulty
Achieving mastery in Fector’s Challenge is time-consuming, with completion times ranging from 5 to 20 hours.
Personal experience and various factors, such as skill level and luck, can significantly affect the time required. Levels 2-3 and 3-3 pose considerable difficulty, underscoring the importance of perseverance and a touch of luck in conquering Fector’s Challenge.
Conclusion
Obtaining the Fector’s Challenge Achievement in Stardew Valley requires dedication, skill, and perseverance. By following the strategies, tips, and purchasing recommendations outlined in this article, players can overcome the difficulties of Fector’s Challenge.
Remember to save progress after each level, strategize purchases, and use the valuable tips provided. With practice and some luck, players can conquer Fector’s Challenge and experience the satisfaction of overcoming one of Stardew Valley’s toughest trials.