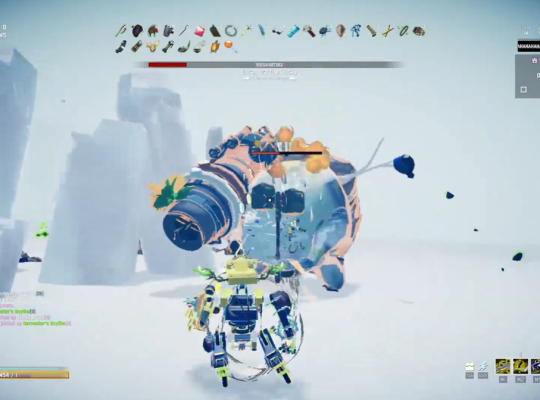
One of the most fascinating aspects of Risk of Rain 2 is the presence of lunar items, which can be found scattered throughout the levels. Lunar items are powerful artifacts that can grant players special abilities and abilities that can help them survive the dangers of the game.
In this discussion, we will delve into every lunar item found in Risk of Rain 2, exploring their effects, how they can be used to gain an edge in the game, and uncover the secrets they hold!
How To Get Lunar Items?
Lunar Items can only be acquired via two means: purchasing them at the Bazaar Between Time or finding them in Lunar Pods. Lunar Coins are required to obtain Lunar Items, and they can be obtained by defeating enemies, using specific items, obliterating oneself at the Obelisk, or completing the game. Lunar Pods require one Lunar Coin to be opened and will randomly provide a Lunar Item.
The Bazaar Between Time is a special location that allows players to purchase specific Lunar Items using Lunar Coins. These Lunar Items can be obtained by purchasing Lunar Buds for two Lunar Coins, which will give players a choice of three random Lunar Items to choose from.
To access the Bazaar Between Time, players must first locate and activate a Newt Altar for one Lunar Coin. Once activated, a blue portal will appear after completing the teleporter event, leading the player to the Bazaar Between Time.

Here’s the breakdown of the different ways to obtain lunar coins in Risk of Rain 2:
- Defeating enemies, which may randomly drop lunar coins
- Using the Forgive Me Please item, which grants lunar coin drops
- Obliterating oneself at the Obelisk, with more lunar coins awarded if the player has the Beads of Fealty and defeats the boss
- Completing the game by defeating the main boss and escaping, which provides a set amount of lunar coins.
Lunar Item Breakdown
Brittle Crown
It provides a 30% chance of granting gold per hit, which can be incredibly useful in the early stages of the game when players are struggling to earn money. However, players also lose gold equal to the damage they take, which can be a significant disadvantage in the later stages of the game.
When players are looping, the Brittle Crown can become even more problematic as players can lose gold from even minor attacks. However, the item can still be a useful option for players who are in desperate need of cash.
For example, players can use the Brittle Crown in combination with other gold-generating items to maximize their income and gain an advantage over their enemies.
Beads of Fealty

This item serves a crucial role in unlocking a hidden ending in Risk of Rain 2. This ending requires players to defeat a difficult final boss known as the Twisted Scavenger.
To access this ending, players must first reach stage 7 or beyond and use the Fractured Celestial Portal to access A Moment, a unique stage that allows players to access the Obelisk, a powerful structure that obliterates the player character.
To successfully access the hidden ending, players must obliterate themselves at the Obelisk after using the Beads of Fealty, which guarantees a visit to the Bazaar Between Time, a rare location that provides access to rare and powerful items.
By offering the Beads at the Altar of Gold within the Bazaar, players can gain access to the special ending that reveals more about the game’s lore and backstory.
Defiant Gouge
This turns every Shrine into a Shrine of Combat. It can be exciting for players who enjoy this kind of challenge, but it is otherwise best avoided. The number and difficulty of enemies spawned by the Defiant Gouge scale in accordance with the number of Gouges owned by the player and the ambient difficulty of the game.
This means that the enemies faced can become too difficult to handle, and the money earned from killing them is not worth the trouble. Overall, players should only pick up the Defiant Gouge if they are looking for a difficult challenge.
Corpsebloom

This item is generally not a good choice as it splits the player’s healing into small bits over time, making the healing process longer. Even stacking the item can reduce the amount of health received per second, making healing even slower.
However, Corpsebloom can be effective when paired with Rejuvenation Rack, which doubles both the total amount of health restored and every tick of health received. This combination allows players to continually restore their health, which is useful for quickly recovering from attacks. Nevertheless, having healing in bursts is often more beneficial than having it over time.
Egocentrism
An item that spawns orbiting bombs to damage nearby enemies. The bombs cannot trigger Runald’s Bands or Kjaro, but they can trigger other items. The item’s main drawback is that it converts one of the player’s items into itself every 60 seconds, but it only deducts one item and not a whole stack. If players can maintain a steady flow of items, Egocentrism can provide a strong source of damage that can easily defeat bosses.
Each stack of the item halves the time it takes to spawn another bomb and increases the bomb cap, allowing players to have a cluster of bombs orbiting them. Additionally, Egocentrism provides an endless supply of items to use at Cleansing Pools, and players can even get rid of it if they find it overwhelming.
Eulogy Zero
An item that has a 5% chance of transforming every spawned item into a random Lunar Item. It is a good choice for players who like Lunar Items or are looking to complete the Logbook. However, if players are not interested in Lunar Items, Eulogy Zero is not recommended.
While Lunar Items are powerful, having too many of them can make runs unstable and vulnerable to failure. Other items, such as those that increase movement speed and damage output, can provide useful boons without the risk of instability.
Essence of Heresy

This can drastically change a player’s build. Once picked up, it replaces one of the player’s skills and grants access to Ruin, a powerful debuff that can stack on enemies with each attack. When activated, Ruin detonates all the stacks of the debuff, dealing damage based on the number of stacks applied.
Ruin can be a valuable asset in a player’s arsenal, especially when used in conjunction with the Death Mark item, which amplifies damage based on the number of debuffs on an enemy. However, it’s important to note that Ruin has a cooldown and cannot be applied while it’s still active.
Stacking Essence of Heresy can increase the duration of Ruin, but it also increases its cooldown, making it a risky decision.
Hooks of Heresy
This is another item from the Heresy set that depends on the survivor you choose at the start of your game. If you feel your secondary skill could use an upgrade, you can acquire Hooks and try out its accompanying skill, Slicing Maelstrom.
This skill fires out a traveling area-of-effect that immobilizes and damages enemies upon explosion. It works best with items that apply debuffs or on-hit effects due to its multiple hits in a short time.
Focused Convergence
This can significantly reduce the Teleporter charge time by up to 90%, making it an ideal choice for players who want to speed through stages quickly. It’s especially useful for speedrunners or those who want to complete a run in a shorter amount of time.
However, the item comes with its own set of trade-offs. It reduces the size of the Teleporter zone by up to 87.5%, which can make it difficult to maneuver in cramped spaces. Additionally, its effects are capped at three stacks, so players can’t rely on it indefinitely.

When deciding whether to pick up Focused Convergence, players should consider their play style and whether they are comfortable with the reduced Teleporter zone. For players who prioritize speed, Focused Convergence can be a valuable addition to their arsenal.
Gesture of the Drowned
This is highly regarded as one of the top Lunar items in Risk of Rain 2 due to its significant reduction in Equipment cooldowns, which activate automatically once their cooldown ends.
It is generally recommended to acquire a Gesture, except for Equipment that require line-of-sight, like the Preon Accumulator, which may be less effective if triggered during combat. Players are encouraged to test various Equipment with Gesture to determine the best combination.
The Light Flux Pauldron
This can be a double-edged sword depending on your build. It’s most effective when you already have a high attack speed, as picking it up will halve your cooldowns at the expense of halving your attack speed.
This means that the more frequently you attack, the more often you can use your skills, resulting in faster clears and a smoother gameplay experience.

However, if you heavily rely on your attack speed, picking up the Light Flux Pauldron may not be the best choice. Even with the halved cooldowns, your attacks will be slower and leave you vulnerable for longer periods between strikes.
As such, it’s important to weigh the benefits and drawbacks of this item before deciding to pick it up. This item also synergizes well with certain skills that have long cooldowns, such as the Mercenary’s Blinding Assault or the Artificer’s Nano-Spear. With the reduced cooldowns, these skills can be used more frequently, providing a significant boost to your damage output.
Purity
This item offers a unique trade-off to players. On one hand, it reduces the cooldowns of all skills by a flat amount, allowing players to use them more frequently.
On the other hand, it increases the player’s unluckiness, making random events and effects work against them. This can be a risky choice, as the player may find themselves facing more challenging situations due to the increased unluckiness.
However, Purity can be incredibly powerful when stacked, especially for certain characters like Commando. With only three Purity items, the Commando build can remove all of their cooldowns and spam their skills endlessly, making them an unstoppable force on the battlefield.
To counter the luck debuff, players can stack 57 Leaf Clovers, but obtaining that many can be challenging. Instead, players can focus on picking up items with a 100% proc chance, such as Lens Maker’s Glasses, which will always activate regardless of luck.
Mercurial Rachis
This offers players a unique mechanic to strategize and plan their attacks. The item’s buff field provides a significant increase in damage output to any character within the area, allowing players to deal with large groups of enemies or bosses much more quickly.
However, this item also comes with a risk since enemies can also benefit from the buff when they enter the area. This can make encounters more challenging, especially if players are not prepared to handle a group of powered-up enemies. Players must use the buff field strategically to lure enemies and eliminate them quickly while minimizing the risk of getting overwhelmed.

Shaped Glass
It gives a simple but powerful effect: doubling your damage in exchange for halving your health. When stacked, the damage increase is doubled again while the health reduction is halved again.
However, this exponential increase in damage comes at a steep cost as it can easily lead to getting one-shot by enemies. In Risk of Rain 2, there is a hidden mechanic called one-shot protection that prevents a player from being killed by a single instance of damage if they are at or above 90% HP.
Unfortunately, picking up Shaped Glass reduces the player’s health to a point where one-shot protection is nullified. As a result, players must weigh the benefits of increased damage output against the risk of getting killed in one hit.
Despite the potential danger, some players still consider Shaped Glass a powerful item, especially in taking down tough enemies quickly.
Stone Flux Pauldron
This item offers a trade-off between movement speed and health. The item halves the player’s movement speed in exchange for doubling their health, making it a useful item for players who have too much speed and struggle with precise movements.

While movement speed is an important stat, having too much of it can make it difficult to control the player’s movements and avoid falling off ledges or getting hit by enemies. By picking up Stone Flux Pauldron, players can mitigate this issue and gain additional health, allowing them to take more hits and survive longer.
Strides of Heresy
This is a member of the Heresy Item set and, like its counterparts, it replaces one of your skills with a unique ability.
Specifically, it replaces your utility skill with Shadowfade, a powerful recovery skill that makes you temporarily invulnerable and restores a substantial amount of health. Moreover, Shadowfade allows you to hover in the air, improving your mobility and allowing you to avoid fall damage.
The utility of Strides of Heresy depends on the survivor you choose at the start of the game. If your survivor’s utility skill is not particularly useful, then picking up Strides of Heresy and swapping in Shadowfade can be a game-changer.

It’s worth noting that while Shadowfade is a powerful skill, it does have a relatively long cooldown, so it’s important to use it strategically. However, with enough cooldown reduction items, it’s possible to use Shadowfade more frequently, making it an even more valuable addition to your arsenal.
Transcendence
This is a highly sought after item by players who enjoy shield-based gameplay [1]. Once picked up, it boosts the player’s maximum health and converts it entirely into shields, leaving only one hit-point remaining. Although shields behave differently from normal health, they can be advantageous when used strategically.
One key benefit of shields is that they will automatically regenerate to full if the player doesn’t take any hits for 7 seconds. This makes it possible to heal back to full without using any other forms of healing. However, it’s important to have good mobility to avoid attacks, as healing has no effect on shields.

Risk of Rain 2 Transcendence also has excellent synergy with Survivors of the Void’s Plasma Shrimp. When Plasma Shrimp is equipped, all of the player’s attacks will fire a missile as long as they have a shield up. Since Transcendence ensures that the player always has a shield, Plasma Shrimp becomes a must-have for maximizing damage output.
Visions of Heresy
This is a powerful item that offers a unique and versatile attack option for players who rely on ranged attacks. The ability to fire tracking projectiles that stick to enemies and explode after a short delay provides players with a potent tool for dealing with large groups of enemies or dealing heavy damage to bosses.
Moreover, the initial hit from Visions of Heresy can trigger on-hit items independently of the explosion, which makes it an excellent choice for players who want to maximize their item procs. This allows players to deal additional damage and effects beyond the already impressive explosive damage of the projectiles.
Effigy Of Grief
This is a Lunar Item that can be used as Equipment and is capable of debuffing all players within its radius. When used, the item will drop permanently and reduce the movement speed of all characters within its range by 50%, while also decreasing their armor by 20.
Players can carry up to five of these items, and it is best used with ranged characters who can avoid being within the debuff zone.

Effigy Of Grief can be a powerful tool to slow down enemies and reduce their defenses, making them easier to take down. However, it is important to note that the item’s effects also affect the player and their allies, so it should be used with caution in multiplayer games.
Glowing Meteorite
This can be both incredibly powerful and dangerous to use. When activated, the item will cause meteors to rain down from the sky, dealing a massive 600% damage to anyone caught in the blast radius, including allies and the player themselves. The meteor shower lasts for 20 seconds, making it a potent tool for dealing with large groups of enemies or bosses quickly.
However, the indiscriminate damage of the Glowing Meteorite makes it a risky choice, especially for players who rely on close-quarters combat.
Survivors like Acrid and the Mercenary, who can easily escape the range of the meteors, may find the item more useful. Ranged characters like Huntress can also benefit from the Glowing Meteorite, as they can avoid being in the blast radius altogether.
Spinel Tonic
This gives a substantial boost in stats to the player, making it a valuable addition to any run. When used, it provides a 100% damage increase, 70% attack speed increase, 20 armor, 50% max health increase, 300% health regeneration increase, and a 30% movement speed increase for 20 seconds.

However, the downside is that there is a 20% chance of gaining Tonic Affliction, which reduces the player’s stats permanently by 5%. This makes the use of the Spinel Tonic a calculated risk, as the benefits can be substantial but the potential drawbacks can also be significant.
To mitigate the risk of Tonic Affliction, it is recommended to carry a 57 Leaf Clover, which reduces the chance of Tonic Affliction from 20% to 4%. This greatly increases the value of the Spinel Tonic and makes it a more viable option for players who want to take advantage of its benefits.
The Heretic - Secret Character
The Heretic is a secret playable character in Risk of Rain 2, unlocked by collecting all four Heresy items. Kur-skaan, the Heretic, has a massive health pool of 450 but suffers from negative regeneration, losing health over time.
This can be countered by using Shadowfade and other healing sources, but be cautious of multiplicative regeneration boosts, which will cause Kur-skaan to lose health even faster.
Wrapping Up
One key consideration when choosing Lunar Items is the strengths and weaknesses of your character. Each character has unique abilities and stats that can influence which items will be most effective. Ultimately, the best way to choose Lunar Items is through careful planning and strategic thinking.
Players should consider their overall strategy for the run, and choose items that will help them achieve their goals. This may involve taking risks or sacrificing certain benefits to gain others, depending on the player’s individual playstyle and objectives.