Risk of Rain 2’s vast array of items is one of the game’s essential features, including the Legendary Items that offer unique and powerful effects that can significantly impact gameplay.
Here, we’ll delve into the Legendary Items available in Risk of Rain 2, analyzing each of them. Additionally, we’ll explore how to use these items effectively to enhance gameplay and increase chances of success.
Whether you’re new to the game or an experienced player, this discussion will provide valuable insights into Risk of Rain 2’s world and the Legendary Items that make it an exhilarating and gratifying experience.
S Tier
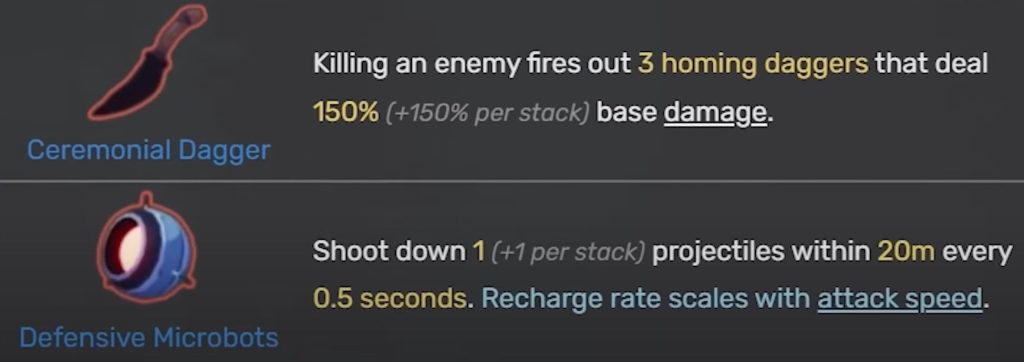
Ceremonial Dagger
This item causes every killing blow to summon a ghostly skull that flies toward and damages nearby enemies. This effect can trigger multiple times quickly, making it highly effective against groups of weaker enemies.
However, the skull’s damage output is not as high against stronger enemies, and the item’s effectiveness decreases as the difficulty level of the game increases.
Its effectiveness is significantly increased when multiple stacks of the item are obtained. Each stack adds a ghostly skull summoned with each killing blow, greatly increasing the potential for massive AOE damage against groups of enemies.
As a result, many players prioritize obtaining multiple stacks of Ceremonial Dagger whenever possible, as it can be a game-changer in terms of offensive capabilities.
Brilliant Behemoth
With Brilliant Behemoth equipped in Risk of Rain 2, players receive a significant 60% damage increase to all of their attacks and add area of effect (AOE) damage to everything they do.
This powerful combination allows players to deal massive damage to multiple enemies simultaneously, making it an excellent choice for players who prefer a more aggressive playstyle.
However, it’s important to note that the AOE effect can also harm the player if they’re too close to the explosion, so caution is advised. Despite this risk, Brilliant Behemoth remains a highly sought-after item for its incredible offensive capabilities.
57 Leaf Clover
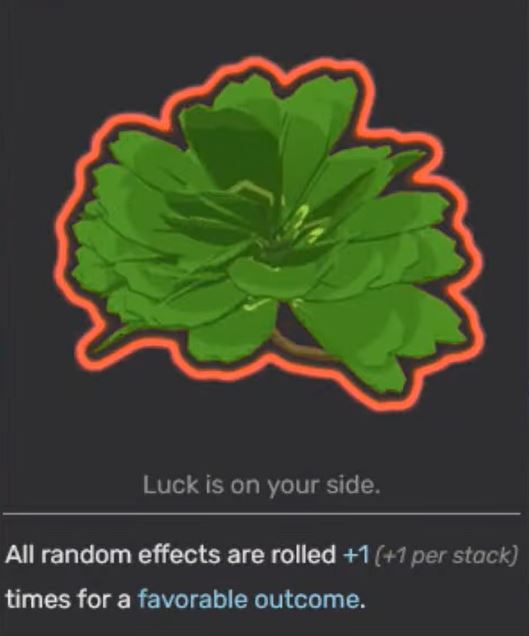
While the 57 Leaf Clover Legendary Item may seem unassuming at first glance, it is a highly valuable item that should not be underestimated.
In addition to increasing the chance of beneficial item effects, the 57 Leaf Clover can reroll almost all random effects in the game, including those from shrines of chance, proc chances, and crits.
The equation to calculate the new proc chance when using x amount of 57 Leaf Clover items and the base proc chance is p is as follows:
y = 1 – (1 – p)^(x + 1)
In this equation, y represents the new proc chance, the probability of a beneficial item effect occurring with the additional 57 Leaf Clover items.
The variable x represents the number of 57 Leaf Clover items equipped, and p represents the base proc chance of the item in question.
Rejuvenation Rack
This provides a significant boost to the player’s healing capabilities. When equipped, it doubles the amount of healing received from all sources, including healing items, abilities, and passive effects. This allows players to keep their health high more consistently, which is especially useful during extended battles or against tough enemies.
Additionally, the increased healing can help players quickly recover from damage and continue their progress through the game. Rejuvenation Rack is a versatile item that can be useful on any character, making it a valuable addition to any player’s collection.
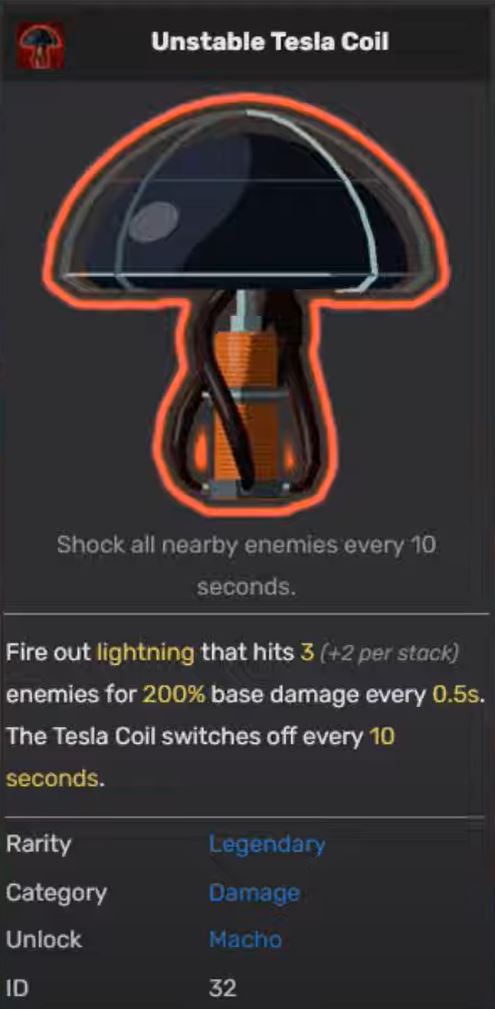
Unstable Tesla Coil
The damage output of this item in the game is nothing to be taken lightly. When equipped, the item periodically releases arcs of electricity that deal a base damage of 400% to up to three nearby enemies.
This can be devastating against groups of enemies, especially when combined with other items that increase attack speed or damage output. However, it’s important to maintain a safe distance from enemies when using Unstable Tesla Coil, as the electrical arcs can also harm the player.
Despite this potential risk, Unstable Tesla Coil is a popular choice among players who favor a more passive playstyle, allowing them to deal consistent AOE damage without direct input.
Alien Head
This item can significantly increase the player’s offensive capabilities and survivability. When equipped, it reduces the cooldown time of the player’s abilities, allowing the player to use their abilities more frequently.
This effect can stack with additional Alien Heads, further reducing the cooldown time of abilities. This reduction in cooldown time enables players to play more aggressively, as they can use their abilities more often to damage enemies or heal themselves.
Additionally, by reducing the cooldown time of defensive abilities, Alien Head also allows players to be safer in combat by enabling them to use their defensive abilities more frequently.
A Tier
The Sentient Meat Hook
This can be used to set up combo kills against groups of enemies without the help of a Primordial Cube. When equipped, the item allows the player to use a grappling hook to pull themselves toward an enemy, dealing damage and stunning them.
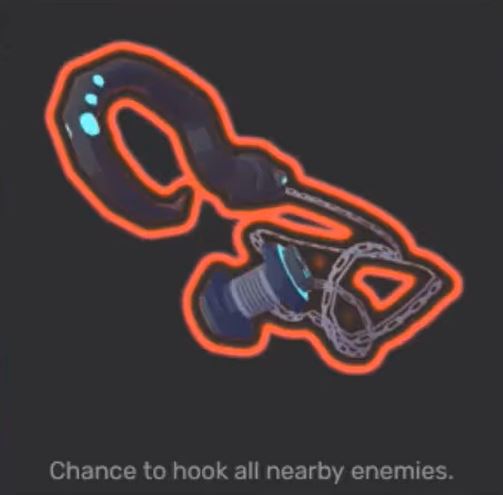
This effect can be chained together by targeting multiple enemies quickly, allowing the player to rapidly move around the battlefield and deal damage to groups of enemies.
This can be especially effective when combined with high-damage attacks or area-of-effect [1] abilities. The Sentient Meat Hook is a versatile item that can be used for offensive and defensive purposes, allowing players to quickly move out of danger or pull enemies away from allies.
When multiple Sentient Meat Hooks are stacked in Risk of Rain 2, their hook-able targets increase by five, and the proc chance of the item increases according to the following equation:
y = 1 – 1/(0.20x + 1)
Soulbound Catalyst
This boosts a player’s combat abilities by resetting the cooldowns of their equipment items during battle.
Upon equipping the item, the player’s equipment item cooldowns will be reset automatically every time they kill an enemy, allowing them to use their items more frequently and strategically.
The item’s effect can stack with additional Soulbound Catalysts, further reducing the cooldown time.
The Hardlight Afterburner
This item adds two extra charges to the player’s utility skill. This item can prove advantageous during combat by providing a contingency plan for times when the primary utility skill is on cooldown or unavailable.
For instance, if the player’s utility skill is a healing ability that is not immediately usable due to a cooldown, the additional charges bestowed by the Hardlight Afterburner can allow the player to utilize the ability when required.
Furthermore, the extra charges can benefit players who enjoy playing aggressively. They can employ their utility skills more frequently to inflict damage or defend against enemy attacks.

B Tier
The Frost Relic
Despite its cool appearance, it is not very powerful. One of its main drawbacks is its low damage output, as it only deals 99% damage per second to enemies within its range. This makes it difficult to inflict serious damage on enemies, especially in the game’s later stages when enemies are more powerful.
As a result, many players may find the Frost Relic a less effective option than other items available in the game. However, it’s important to note that the Frost Relic can still be useful in some situations, such as when dealing with groups of weaker enemies.
C Tier
Wake of Vultures
Players may find this item less useful than other items available in the game. Its main effect is to transform unused lunar coins into temporary buffs, which can benefit the player.
However, these buffs are temporary and can expire quickly, making the item less useful in extended battles or challenging encounters. As a result, many players may only consider picking up the Wake of Vultures if it is their first or second rare item, to trade it away at a 3D printer for a more desirable item.

While the Wake of Vultures may have limited usefulness, it can still be valuable in certain situations, such as when playing on lower difficulty levels or during the game’s early stages.
Happiest Mask
This can be useful in combat because it can spawn ghosts that can serve as meatshields. While the ghosts can also make copies of bosses, their main purpose is to distract enemies and distribute aggro when the player is facing multiple opponents.
This can be especially helpful when the player is outnumbered or dealing with tough enemies. However, it has a relatively low proc rate of 10% upon killing an enemy. Due to this low rate, killing many enemies is the only way to generate many ghosts.
While the ghosts can serve as meatshields and deal damage to enemies, their effectiveness in combat depends on the number of ghosts spawned.

Rare Items — Situational
Brainstalks
This can significantly benefit classes that rely on their abilities to deal damage. The item’s key feature is its ability to eliminate the cooldown time for abilities, allowing them to be used continuously without any delays.
This is particularly useful for classes such as Mercenary and Huntress, whose abilities can deal substantial damage but is hindered by long cooldown periods.
With Brainstalks equipped, players can constantly unleash their abilities, vastly increasing their combat prowess. For instance, the item can enable Mercenary to continuously use their perma eviscerate ability or allow Huntress to spam their glaive attack without any breaks.
The H3AD-5T v2
A highly sought-after item in the game, particularly by players who enjoy using the Mercenary character. One of the main advantages of this item is that it completely nullifies fall damage, allowing players to jump and fall from high places without taking any damage.

This can be particularly useful for players who frequently move around the map or engage in combat from higher ground.
Moreover, the H3AD-5T v2 provides additional benefits such as increased jump height and reduced cooldown time for the player’s primary ability, which can further enhance their mobility and combat effectiveness.
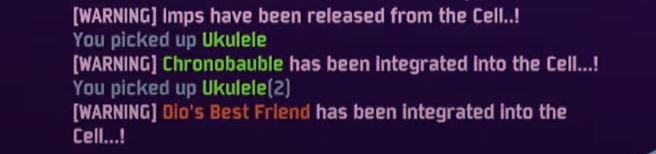
Dio's Best Friend
This item can be particularly useful for the Engineer character. When the player has the item unused in their inventory, any turrets placed by the Engineer will automatically resurrect upon death, providing additional support and defense for the player.
Moreover, the item’s effect can be further enhanced by acquiring additional copies of Dio’s Best Friend, as each copy will provide an additional resurrection for each turret.
This can be especially advantageous when the player faces large groups of enemies or powerful bosses, as the resurrected turrets can help distract enemies and deal additional damage.
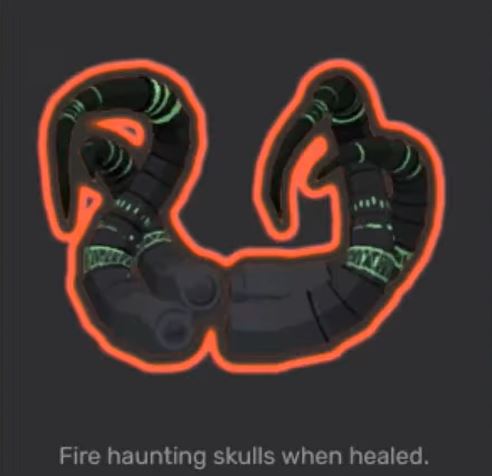
N'kuhana's Opinion
An unusual item in the game requires the player to store their healing to deal damage. As a result, the item is typically most effective for builds with significant healing.
In these cases, the stored healing can be used to damage enemies, potentially inflicting significant damage over time. However, the item’s effectiveness heavily depends on the player’s build and playstyle and may not be as useful for builds that do not prioritize healing.
Similar Posts:
Conclusion
Determining whether or not to pick up legendary items in Risk of Rain 2 depends on various factors, such as your playstyle, preferred character, and the situation you find yourself in. Some legendary items can provide significant benefits and be highly versatile, while others may not be as useful or have more specific applications.
When deciding whether to pick up a legendary item, consider how it will synergize with your character and other items you have and how it may help you overcome the challenges you face in the game.