Are you experiencing mouse lag or stutter while playing CS:GO? There’s no need to worry! This is a common issue most players face in the game and there are ways to avoid this from happening.
In this guide, we’ll help you fix this issue so that you can get back to enjoying your game. Here are tips on how to fix mouse lag and stutter while playing CS:GO:
How to Fix Mouse Lag and Stutter While Playing CS:GO
Encountering mouse lag and stutter is a nightmare and a source of frustration for anyone playing CS:GO and other games.
This will change the way you play, and it can make the game perform very slowly. Fortunately, there are methods to fix it the issue easily:
Fix #1: Update Your Mouse Driver
The first thing you should do is make sure you have installed the official driver for your mouse. You can do it manually through your PC’s Settings menu or through the manufacturer’s website.
But the best way to make sure that your mouse driver is installed correctly is to use special software. Some of the most common errors and bugs in Windows are caused by drivers that are too old or don’t work well together.
A system that isn’t up to date can cause lag, system errors, or even BSoDs. To avoid these kinds of problems, you can use an automatic tool that will find, download, and install the right driver version on your Windows PC with just a few clicks.
Fix #2: Disable the V-Sync Within CS:GO
When V-sync is turned on in CS:GO, the game tries to match the frame rate of the game with the refresh rate of your monitor to make the game more stable.
Even though more stability is a good thing, it doesn’t always mean that the game runs better. In CS:GO, it may even cause the mouse to lag and stutter. By turning off V-sync, the frame rate cap, screen tearing, and input lag will all be unlocked.
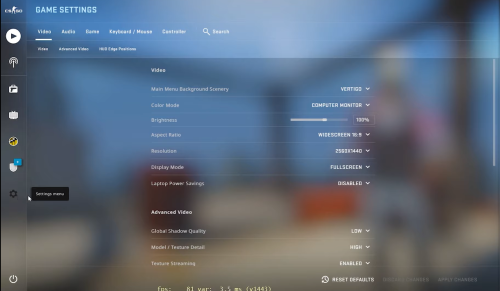
To do this, open your CS:GO game, go to the video settings, find the V-Sync option, and turn it off.
Fix #3: Run the Hardware and Device Troubleshooter
- Press Windows + R to open the Run command, type the following command in the text field, and hit Enter: msdt.exe -id DeviceDiagnostic
- Now, just follow the steps on the screen to finish fixing the problem.
If you want an easy way to automatically find and fix problems a troubleshooter is the way to go. Once you’re done with the above steps, play the game again to see if the mouse lag and stutter have been fixed [1].
Fix #4: Change the Repeat Rate
- Press Windows + R to open the Run command, type "Control Panel" in the text field, and then click "Ok."
- Choose Large icons from the drop-down menu next to View by.
- Select Keyboard now.
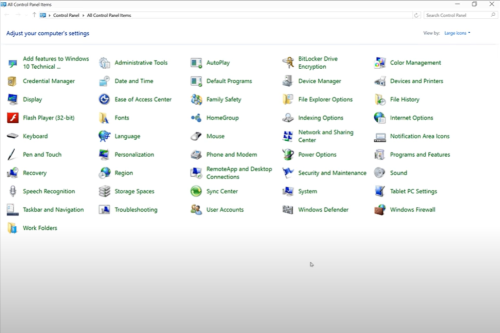
- Then, change the settings for Repeat delay and Repeat rate.
- To save the changes, click Apply and then Ok.
Fix #5: Disable the Automatic Turn Off
- Type "Device Manager" into the search box, and then click on the relevant result.
- Find the Universal Serial Bus controllers option and double-click it.
- Right-click on the first USB Root Hub and then click on Properties.
- Next, click on the Power Management tab and uncheck the box next to Allow the computer to turn off this device to save power.
- To save the changes, click "Ok."
- Repeat the same steps for each of the listed USBRoot Hubs.
We hope that these tips have helped you to fix mouse lag and stutter while playing CS:GO. If you’re still having problems, then you should consider contacting the game’s developer or your mouse manufacturer for further assistance.

