It’s no secret that zombies are a huge part of the 7 Days to Die game. But did you know that there’s more than one way to spawn them?
There are actually several ways to create your own zombie horde on 7 Days to Die. If you want to be familiar with all of them, read on!
How to Spawn Zombies
The first step toward spawning zombies is entering debug mode. To begin, use the “F1” key. This brings up a console on the screen, where the player may input commands.
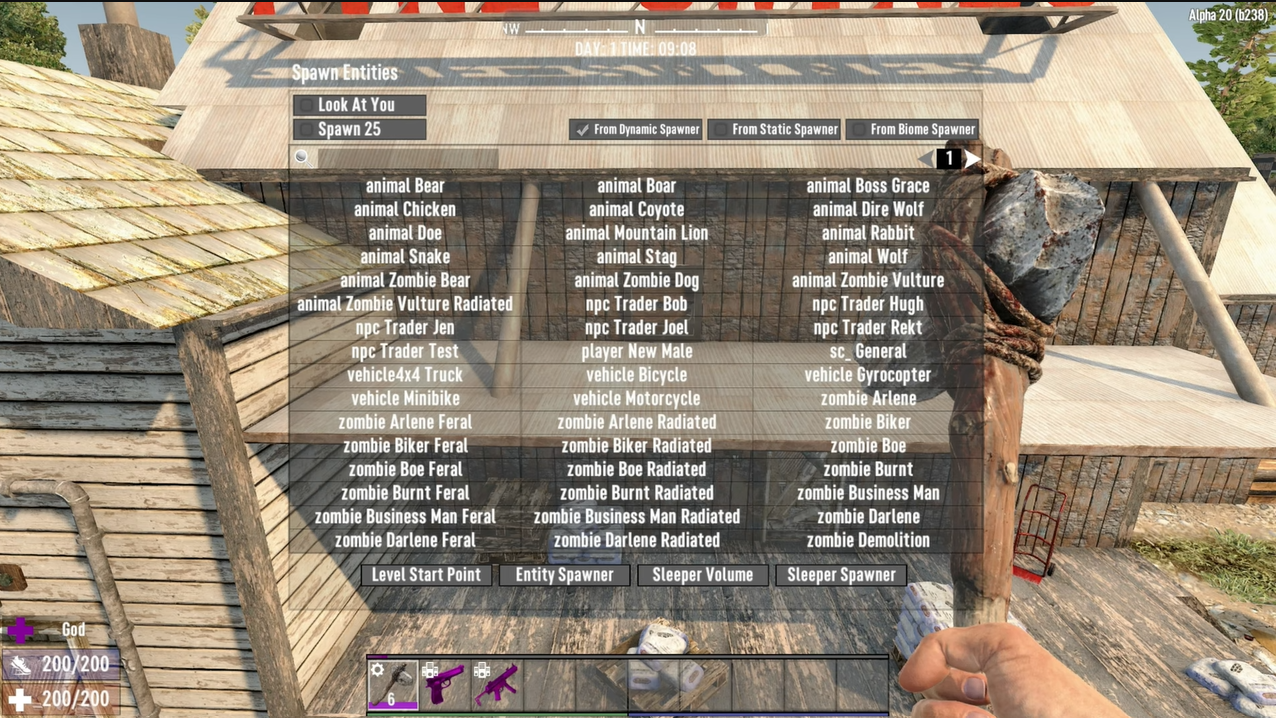
Enter “dm” (debug mode) and press the “Enter” key. Now press “F1” once more, and then “F6” to access the spawn menu.
For many gamers, generating only one zombie is insufficient. Players that want a zombie horde can generate them one by one, however, this can be time-consuming.
Fortunately, the game includes a simple method for creating enormous hordes of the walking dead to test the game’s greatest weapons.
Simply utilize the “Spawn 25” button found in the upper-left area of the spawn menu, right below the “Look At You Option.” This does precisely what the player expects it to do. It spawns 25 duplicates of the presently selected creature.
Spawning a swarm of zombies in an instant is a fun and quick method to get some target practice done. But if you want to move on to other spawns, remember to switch off the “Spawn 25” option after it’s been activated.
This option is not immediately switched off between spawn options, so the user may unintentionally create a swarm of NPCs [1] or more motorbikes than they could source the gasoline for.
Mathew has nursed a love of video games since childhood. Now, as an adult, he enjoys playing challenging games as much as he enjoys relating with other gamers. Matthew created Hypernia to give gamers like himself accurate and reliable information about games, servers, communication protocols, and much more.